My First Junk Journal: thatsjustpenny digi kit
I started collecting "junk" for junk journals a few months ago, and my box of junk mail, cardboard, packaging, etc. is getting to the point where it is starting to flow out onto the floor. Once I started saving paper items that I would normally recycle, I started to see EVERYTHING in terms of how I can use it in a junk journal (including the plastic wrappings that are part of product packaging).
I used the Peacock Boho Digi Kit from thatsjustpenny for the embellishments and overall design inspiration.

Junk: envelopes, bills, packaging, etc.

Paper board used for the cover

Inside cover: print from the peacock boho digi kit

I gelli-printed the junk pages, using colors inspired by the peacock boho digi kit

Sampling of the printed junk pages

I created 3 signatures to sew into the journal. I used the pamphlet stitch to bind them.The binding doesn't end up showing, because I attached a bunch of different fibers and beads to the spine.

I used the pieces that I cut off from the journal pages (in order to make them fit inside the book) to decorate the cover.

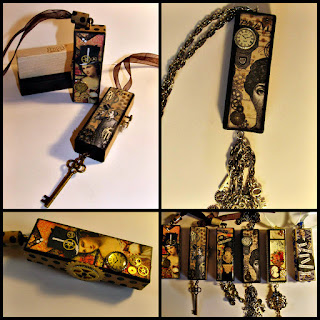
I created paper beads with the left-over pieces of the paper from the digi kit that I used on the spine and inside the cover.

The spine, feathers, and beautiful circle embellishment are from the thatsjustpenny digi kit.

I mounted the journaling cards from the digi kit to some packaging that I gelli-printed.


I edged them in gold and added fibers.

The finished cover


Inside cover, with a tag from the digi kit

I tucked the journaling cards into different envelopes.

I used the circle embellishments from the kit to make these bottle cap paper clips.

The back cover.
Oh my goodness, this is outstanding! I adore the colors you've used. This is SO me and believe it or not, this is on my "want to do list" as well! There is a tote of misc cardboard, etc under my craft desk calling my name. Your photos with descriptions were excellent. I'm a little confused on the best way to bind it all together, so if you can explain that step or point me to a good video tutorial, that would be great. Beautifully done Jen! And congrats on your new blog too! I'll be following you... Happy New Year! ~ Pam :)
ReplyDeletePam, I'm so happy that you like it. Thank you for checking my blog out. I added another post, showing step by step photos of how I did the binding. The difference between the two is that I added fibers and beads to the above journal (and added nothing to the binding of my new journal). I hope the new post helps clarify the binding. If not, let me know and I'll make sure I find something to help you.
Delete